Spring Fever

Lest anyone think I’ve forgotten about the pony, I can assure you she’s still doing her best to enliven my life and keep things interesting. And promote the idea that it doesn’t matter how old or semi-retired they are, horses never lose their capacity for self-destruction.

29365424_10109353186376421_5364375051321737216_n

No clue what happened, but I’ve gotten pretty skilled over the years at dealing with this type of wound/injury, and have the well-stocked first aid kit to prove it. Clipped, cleaned, and layer-wrapped in short order, and since she wasn’t lame, we still went on to have a nice ride.

Pretty sure that was payback for being gone the previous two weekends in a row.

29342934_10109353186241691_8221552017206673408_n

Plus, I had to play with my shiny, Convention-acquired new toys.

Verdict: I thought the Archer Equine saddle pad was going to be huge (“the saddle pad ate my pony”) but it actually fits really well with the Duett. Reserving judgment until I give it several rides and wash it, but for its initial trial run, I liked it.

Myler eggbutt, MB33 mouthpiece, is pony-approved, and she worked really well in it.

And I love the mohair reins. Great feel, and weight-wise, they feel like a perfect balance between flat braid reins and round rope rein. To me, at least, a lot of the flat braid are too insubstantial and light, but round yacht rope is just a little too bulky/thick. Plus the mohair is super-soft and feels really good, even without gloves. I know I’ve had really good luck with my high-quality mohair girths washing up really well and lasting a long time, so I’m assuming the same will hold true for the reins.

Happy Monday, all, and hope the rest of the week treats everyone well!

Ride Story: Man Against Horse 50

So, Man Against Horse happened back in early October…but things definitely didn’t go according to plan, so I’ve had a hard time mustering up the enthusiasm to write about it. Get through all 50 really hard miles…only to get pulled at the finish. I have to say, of all of the pulls I’ve had, this one probably sucks the most.

Short story: Beeba was off at the finish. The vet couldn’t even definitely pick a leg, just that she was “mild but consistently off.” And apparently she looked totally fine in her pasture once she got home later that evening. :/

I’m trying not to let the finish line pull completely cloud the good aspects of the weekend: riding and camping with good friends, some really good learning moments with pacing and smart trail strategy, the gorgeous fall colors on Mingus Mountain, the stunning scenery , and an overall fun time in the saddle.

But still, it stings. For whatever reason, I can feel good about the pull at Virginia City — we tried something hard, got the furthest we’ve ever been, and had a really good experience. This one? There are no good feelings about it. I’ve finished the ride before, she’s finished the ride before. It’s depressing and I’m bummed out about it. Also, to finish all the miles…but to ultimately have it not count for anything? Feels like a double insult.

Plus, a lameness pull makes me second-guess myself. What did I do wrong? Should I have slowed down even more? Done even more than I did on foot? Was it too soon after Virginia City? Should I have even started the ride? Y’know, all the shoulda-could-woulda armchair quarterbacking after the fact. Even a month later, I don’t know what I could have done differently, other than not ride.

It sucks, but we’ve concluded (based on not just these last two rides, but her entire ride history, which has been seriously up and down) that her forte is probably more as a LD/competitive trail horse rather than a 50+ miler. I’m bummed, because I really enjoyed riding her, and I let myself get way too excited and start thinking way too optimistically/far ahead with planning and future scheming.

Anyway, moving on to the ride itself. It basically took a village to make it happen. Kim wasn’t going to be able to ride, but I could still take Beeba, and she would come up and crew. I was able to find a ride for Beeba with a friend…but Barb was going to be working until late Friday afternoon and wasn’t sure when she would actually get to camp. So a convoluted plan was hatched, and despite the fact I felt like a flowchart was needed at times, it all ended up working out really smoothly.

  • Step One: Since Barb is about an hour away from me, and needed to leave for work early Friday morning, the plan was: drive my truck to Barb’s house Thurs night. Put all my ride stuff/food in her trailer, stay at her house overnight.
  • Step Two: Barb takes my truck to work. I load up Barb’s horse and drive her rig to Kim’s. Pick up Beeba. Kim follows in her car and we drive to the ride. Get camp set up and both horses vetted.
  • Step Three: Barb leaves from work Friday afternoon in my truck and drives straight to the ride.
  • Step Four: After the ride, all the stuff gets sorted into our respective vehicles, Barb drops Beeba back off at Kim’s, I drive straight home.

Endurance. It takes a village.

Ok, so we established that I drove the horses up to the ride on Friday. I’ve gotten pretty comfortable with rig driving this year, and feel like I’ve earned at least fledgling membership into the “endurance girls who can drive anything” club.

IMG_9773

Piggies!! Javelina (collared peccary) family crossing the “road” into base camp. (Fun fact: Only very vaguely related to pigs.)

Base camp is a big open cow pasture on the Fain Ranch just outside of Prescott — open parking among the rocks and random clumps of cactus. A spot that was free of rocks was cleared, horses got settled, then I spent a couple hours puttering around and socializing before rider check in and then going to vet in.
74034287-2017-ManAgainstHorse-0046

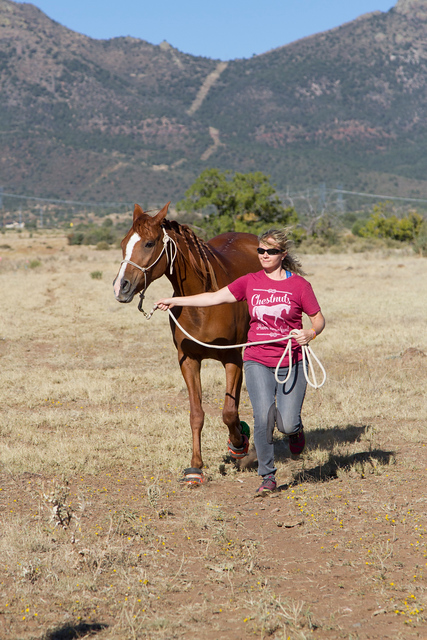
This is kind of fun, because I have virtually no photos of me vetting in at endurance rides. My showmanship and halter upbringing is showing through. (photo: Sue Kordish, Cowgirl Photography)

After vetting in, I did a really short pre-ride with Beeba — meandered through camp, socialized along the way. Tried to head out along the finish trail, ended up feeling like I had a red-hot powder-keg under me. Errr, that would be a big old “nope” on that idea, so we walked politely(ish) back to the trailer red mare then got to trot schooling circles until she settled.

IMG_9780

pre-ride, acting fairly calm and innocent

One of the things I miss the most about riding Mimi in competition is her complete lack of explosiveness. She would spook at something, and be done. Interestingly enough, she had that “up” side that tended to appear at shows, especially large ones in new venues. But at distance rides? Never. Plenty of energy, and plenty of wanting to go forward, but I was never concerned about her bucking, rearing, spazzing and dumping me, or other variations of untoward behavior.

Friday evening, a couple dozen of us gathered for one of the “Zonie potlucks.” I’m skeptical of potlucks because so often it turns into everybody bringing a bag of chips or box of cookies and calling it good. Well, Zonies apparently love their food, because there was a glorious spread of main dishes, side dishes, and delicious homemade desserts. Yum. My contribution was a Mexican Street Corn salad, which seemed like a big hit since I only brought home a small amount of leftovers.

Ride briefing went by really quick — it seems like nothing had changed since the last time I had done the ride (2009). I should also add that this is my “anniversary” ride — it was Mimi’s and my first AERC ride back in 2005. We did the LD, and finished, and I’ve been hooked on this sport (despite questioning my sanity sometimes) ever since. 12 years in endurance…but that’s musings for another time and post.

Barb and I took the horses for a final walk around camp to stretch their legs, then retreated back to the warmth of the trailer. I was in bed at a decent time, and the 6:30 ride start meant the alarm was set for early, but not unreasonable.

Ride start nerves were out in full force again Saturday morning, albeit not as bad as at Virginia City. Barb and I waited back at the trailer until the pack cleared out (To recap: it’s an uncontrolled, “shotgun” start [at least they don’t actually fire a gun anymore] that drops through a rocky wash, then opens up through an open field. And you sort of just roughly follow along what used to be an old two-track road but has gotten fairly overgrown. Not a conducive environment for two horses who are not known for having the best start line behavior.

So we waited until a couple minutes after the start, hand-walked over to the start, mounted up, and headed straight out. Since the pack was pretty much out of sight, we were able to pick up a polite trot right away, and that was that. Beeba was settled within the first couple of miles, and she was perfectly happy to trot along behind Barb’s horse K-Man.

We kept it to a nice trot through the sand wash that is basically the first 5 miles of the trail — each year, it gets a little bit shallower and more trottable. By the time we headed out of the wash, we had caught up to the tail-end of the pack, and just kept steadily trotting along, catching and passing people.
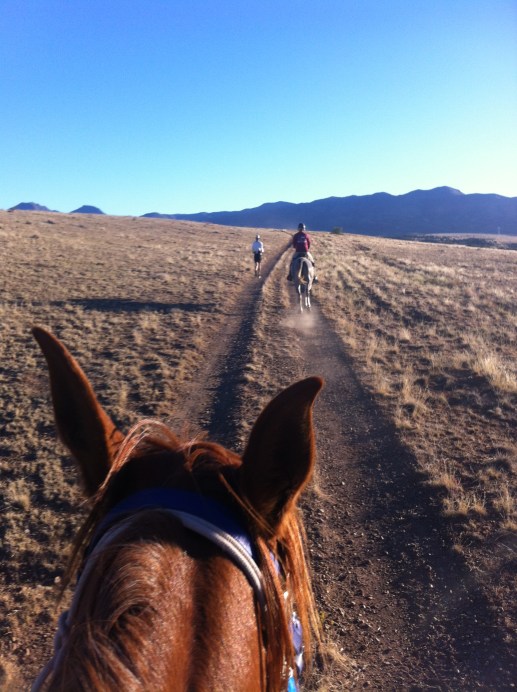
IMG_9798

About 7 miles in, through the “rolling plains” section.

About 9 miles in, the trail hits one of my favorite sections: “the grapevine.” It’s roughly 7 miles up to the first vet check, and most of it is winding up through a canyon, twisting and turning in and out along a dry streambed, and then climbing up through manzanita bushes. So pretty, and so fun, especially on a athletic, agile horse.
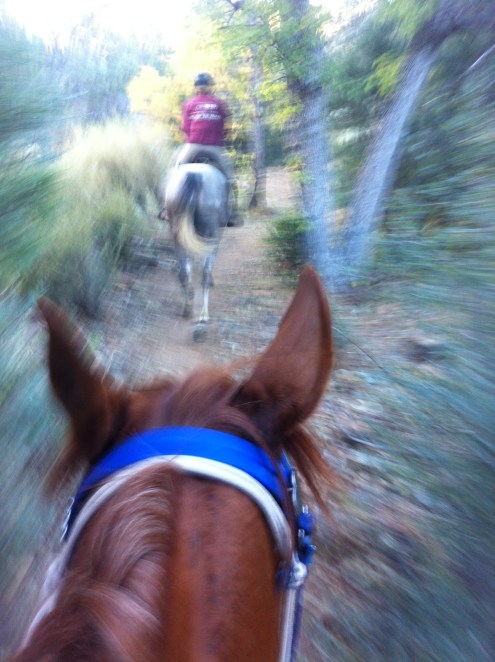
IMG_9801

psychedelic endurance?

IMG_9808

out of the canyon and up into the manzanita. view is looking towards Prescott and the Bradshaw Mountains in the distance.
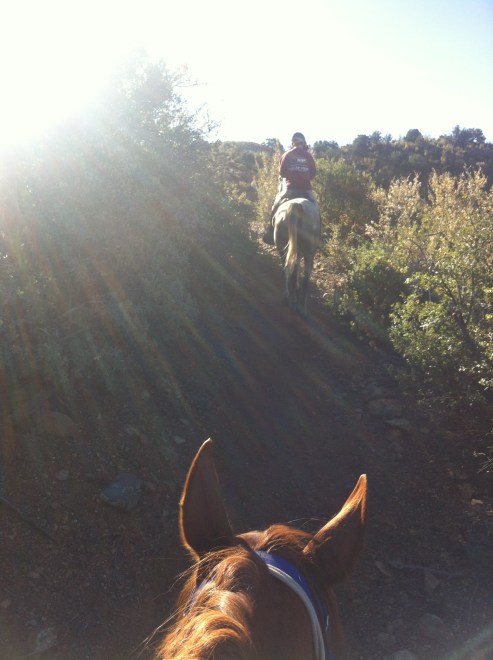
IMG_9810

in the manzanita tunnel, only a few miles out from the first vet check

74034290-2017-ManAgainstHorse-0165

at the top of the climb, only about a mile from the check. (photo: John Kordish, Cowgirl Photography)

The approach into vet check 1, Mingus Springs Camp at mile 16, is about perfect. A downhill onto a two-track road, with lots of space to jump off and lead in.

By the time we walked to the troughs and Beeba drank, she was pulsed down — to 52. Vetted through, and then she set to work remedying those B’s on the gut sounds. In the course of about 20 minutes, she managed to stuff in a whole pan of mash, some hay, and start eyeballing some of the other horses’ mashes.

It was bit of a novelty to have a crew there, and to be able to hand the horse off to Kim and sit quietly and work through my own food cooler. Turkey lunch meat, cheese stick, and pasta salad all disappeared quickly, and then it was time to put the bridle back on, tighten the girth, and mount up, right on our out time.

I had kind of forgotten about parts of the next section — it involves quite a bit of forest road, combined with some sketchier “trails” to get from one road to another. And a lot of rocks. SO many rocks. After VC and this ride, I may have threatened that I didn’t want to see anything but a groomed sand arena for the next several months.
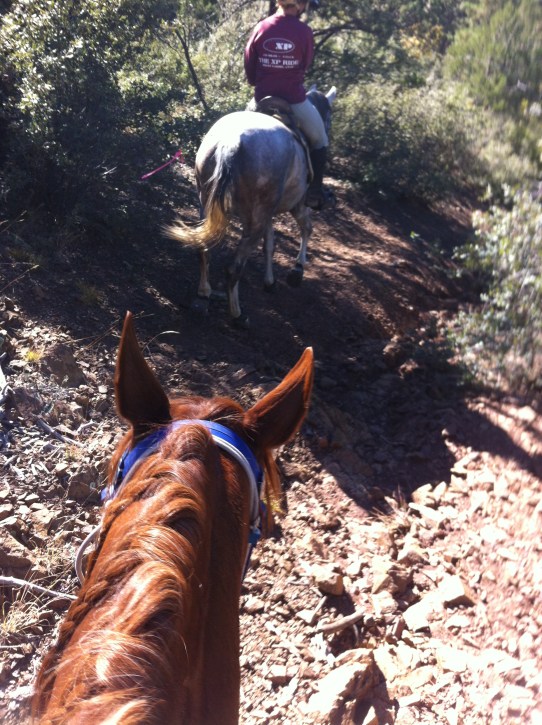
IMG_9816

oh look, more rocks

Parts of this section are really pretty, because it’s at a high enough elevation that there are lots of trees around, and some pleasant shady areas. And once you’re on the roads, there is plenty of area to move out…in between the rocky areas.

IMG_9833

on the long road around Mingus Mountain

IMG_9855

scenic overlook: looking down into the Verde Valley, and to the red rocks of Sedona in the distance

The scenery through this section is amazing, though. It overlooks the whole Verde Valley, and out into the red rocks of Sedona. It’s stunning, and photos barely begin to capture the colors, let alone the feeling of that immense of a view. Just one of the reasons I love this state.

IMG_9853

rode for a while with Cristina and Atti through this section

photo 1

flying

The ride was perfectly timed to catch the changing of the leaves as well. Sometimes when it’s within the first day or two of October, the leaves have barely started changing, but the ride date ended up falling on the 7th this year, and that was late enough to start really seeing the leaves.

IMG_9845

who says Arizona doesn’t have seasons?

Contrary to popular myth, parts of the state actually do have four seasons. The Valley just isn’t one of those parts. But anything that’s higher elevation definitely does.
IMG_9856

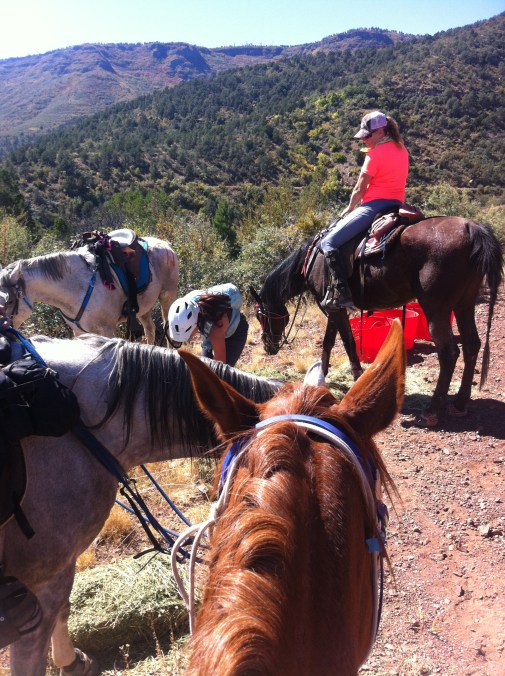
water and snack break before the real climbing begins

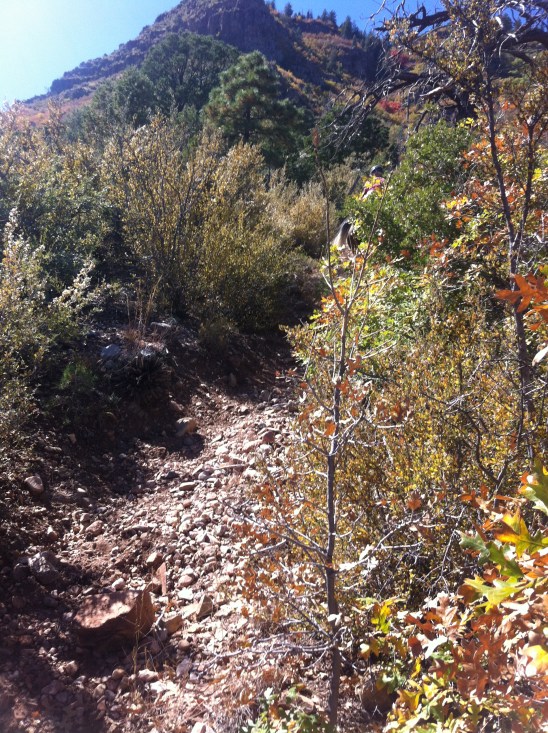
To get to vet check 2, at the top of Mingus Mountain, there’s a 3-mile climb with an almost-2000′ elevation gain, with some parts through some technical single-track (read: stepping up through/over rocks and boulder on an uphill). It’s hard. It ate our lunches the first time we did this 50, and I hopped off and led Mimi through it the second time around.

IMG_9861

taking a quick breather in the shade

This time, I stayed mounted, but that was a climb that definitely took the wind out of their sails. Beeba was tired, and K-Man experienced his first “I think I met Jesus” moment there on the mountain when he slowed his relentless forward movement and voluntarily stopped to eat. Ah, nothing like a hard ride to teach them how to take care of themselves.
IMG_9864

steep, rocky climb

I honestly don’t remember the climb being that hard, especially the second half. Either I blocked it from my memory…or I never realized just how much of an amazing hill pony Mimi is.
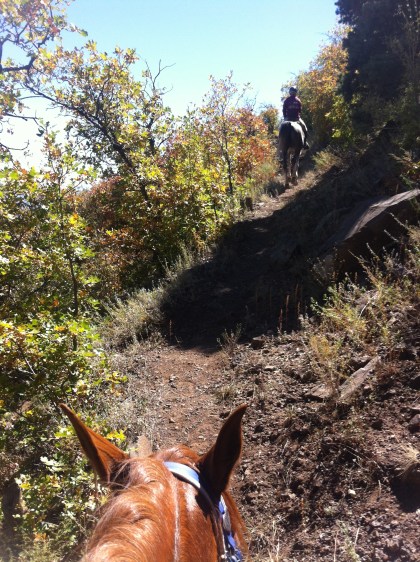
IMG_9885

more climb

IMG_9890

postcards from Arizona

IMG_9882

those radio towers are where we are going

We finally, finally reached the top…there was a checkpoint and water there, and the horses really tanked up. We only stayed there for a couple of minutes, wanting them to keep moving rather than stand around and cramp up. It was a mile of easy service road into the check, and we moseyed, alternating walking and trotting, right into the vet check.

Beeba’s pulse down down, and she vetted through well — one standalone ‘B’ for impulsion, A’s on everything else. Kim had a nice spread set out — sun for the horses, shade for the riders — and we each set to work on our respective food offerings. About 15 minutes into the check, Beeba started shaking, and looked really stiff when Kim walked her. We threw another fleece on her, gave her extra electrolytes, and Kim alternated walking her and letting her graze. Apparently she did the same thing at the check last year with Kim — we weren’t sure if she was tying up, or just cold, because she’s very cold-sensitive, or the post-climb exertion.

Needless to say, that put a major damper on my mood, as I went from “feeling good” to “gut knotted with anxiety.” Kim took Beeba over to the vet and got the “all clear” — her muscles were good, all other parameters were good, pulse was low — so probably just cold/exertion. I was worried about taking her back out, but between the vet’s okay, Kim’s okay, the fact she had done the same thing last year, a decision to really take it slow on the last third, plus me getting off and running, we headed back out again.
74034292-2017-ManAgainstHorse-0637

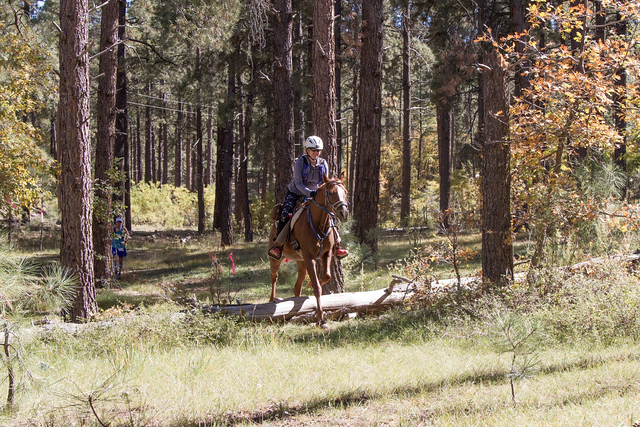
after vet check 2. cross training? (Photo: John Kordish, Cowgirl Photography)

It’s pretty much “all downhill from here” after vet check 2, and I ended up hopping off and hiking/running any of the longer stretches of downhill. I could not believe how rocky and washed out this section has gotten. This was my absolute favorite part of the trail previously, because it was this smooth, flowing, slightly downhill single track that Mimi just flew down. Now, it was rutted, rocky, and a stumbling walk was the best gait we could hope for in many parts.

Right before we hit vet check three (a pulse/vet/go) I could feel Beeba take some funky steps when we were trotting along the forest road. Nothing I could pinpoint, but felt like there was a bit of a hitch somewhere in her gait. When we got to the check, we took a couple minutes to drink and pulse, then went over to vet. I had to trot her a couple times and the vet said she maybe saw “something” but just take it easy on the way back — which was literally all downhill at this point.

So we hiked out of the check, hit the section of switchbacks down Yaeger Canyon, and hiked and jogged the next several miles down the switchbacks. At the bottom of the canyon (and the last few miles into canyon) I hopped back on, but couldn’t really tell if it had made any difference or not. There was no definitive lameness, but she just didn’t feel 100%.

IMG_9898

Yaeger Canyon on foot

So we moseyed and took it fairly easy back into camp. Shoutout to Barb for being a real awesome riding partner and not ditching me. She certainly could have — K-Man was strong and had plenty of gas in the tank. But I really appreciated her sticking with me to the end.

Coming in to the finish, I was feeling a little hopeful — Beeba wasn’t 100%, but she wasn’t any worse. So maybe we would be okay?

Yeah, not so much. We vetted through right away, but after trotting back and forth a couple times, even yanking the tack and pulling her boots to check for any dirt/stones (nothing), it still wasn’t good enough to pass the vet’s scrutiny. They couldn’t even pinpoint a specific leg, just that she was “off.”

And that’s how I got my first finish line pull.

Barb and K-Man finished, and looked great.

Since it’s a close-by ride, we packed up camp, horses got their legs wrapped and a couple hours of recovery time, then we all hit the road. Beeba came out of the trailer sound back home and moseyed around her turnout looking none the worse for the wear.

Obviously, things didn’t go according to plan, and it kind of put a crimp in future plans. At this point, we’re operating on the theory that Beeba is probably a better LD/competitive trail horse than an endurance horse. These are not her first pulls, and it’s not fair to her, or whoever is riding her, to keep trying to pursue something that she’s probably not optimal for. It’s hard, because I really enjoyed riding her and spending time with her, and if she was my horse and the only option I had to ride (like it was with Mimi), I would probably spend the time and $ seeing if I could make things work. But reality is, she’s not mine, so it’s not my call, and I’m not going to put money into a horse that isn’t mine.

This has certainly been an interesting ride season, that’s for sure. And I say that with the full intent of “interesting” being used in the context of a curse versus a compliment.

Pony Rides Photo Spam

I’ve gotten some good saddle time in over the last few weeks, both with my own pony as well as some more catch riding. But today seems like a good day for fewer words and more photos, so it’s pic spam time.

Retail Therapy
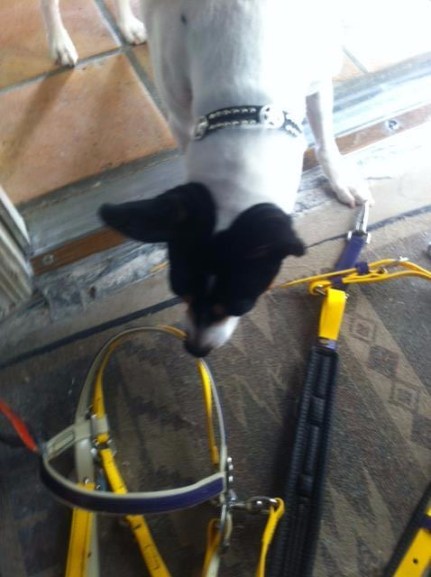
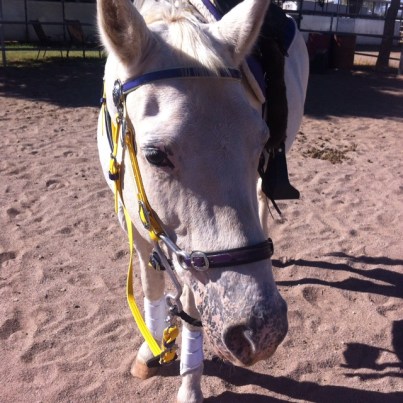
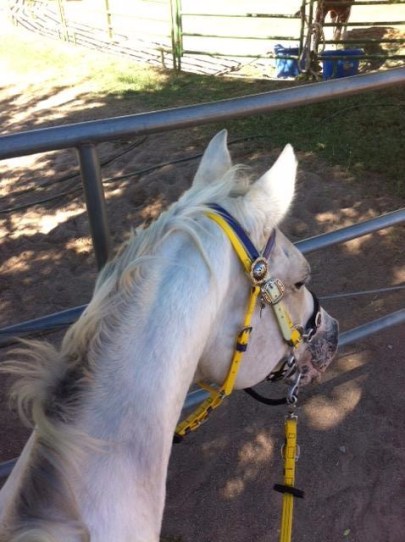
I scored a Hought Tack set (headstall, reins, breastcollar) on eBay at the beginning of last month. Very tricked out with glowbelt biothane and Horseshoe Brand hardware. Color combo is a little more “unusual” with the yellow/purple…but I actually ran a variation on this scheme for years with Mimi (mostly purple with yellow accents).

And while I certainly don’t need any more tack, it was a good balm to come home to this in the mail after an inglorious pull at Man Against Horse (that story still to come). Pony has been pressed into fashion plate service, and I’m really pleased with the fact it fits her really well. I took a chance on that aspect, since there was no size listed, but its obviously some sort of Arab/Cob size.

photo 4 (1)

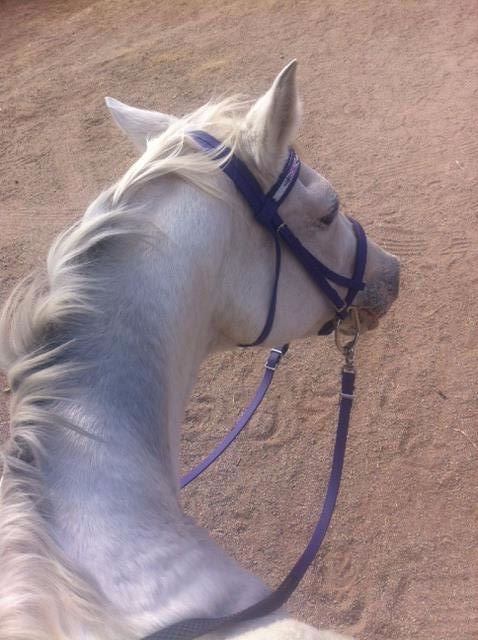
new tack meets Sofie inspection approval

photo 1 (1)

“why do you do this to me, Mom?”

photo 5

the color combo looks really good on her, especially the yellow

photo 2 (1)

not happy at the neighbor’s bull

Catch Ride — Wyatt
Two weeks ago I did a 20-miler with Andrea (whom I rode with at Virginia City) on her mustangs, Lilly and Wyatt. I rode Wyatt, who is a large, sweet, 7-yr-old gelding. He’s a fun guy, like riding a big, comfy couch, and while still a little young/green with some things, he’s very honest and has a huge try.

photo 3 (5)

Wyatt Earp

photo 1 (3)

toodling along behind Andrea and Lilly

photo 2 (4)

working on being a brave leader

22894130_10203893696579838_8128171096459110698_n

he was fun, and good for my confidence and ego — super-honest, with a big try, so as long as I was “with” him and supported him, he responded in kind and just got braver and braver the more leading we did

Catch Ride — Atti
Yesterday, I met up with Cristina and her two boys, Atti and Cosmo. She had asked me earlier last month if I would be interested in catch riding…she was the first to ask, so she got first dibs on me. :) She’s up in the Prescott area nad I’m down in the Phoenix valley, so we’re not super close, but we were finally able to make our schedules align to meet halfway and do an “introduction” ride.

Atti’s a ton of fun — he’s another Al-Marah (yes, that makes 4 AM horses I’ve ridden…one of these days I’m just going to have to get my own) and he reminds me so much of riding Mimi. Very strong and fast for his size, super catty/agile, but also bold, forward, and sensible.

We met up at the southern-most trailhead of the Black Canyon Trail, and headed north, exploring one of the last sections of the BCT I hadn’t yet seen. (There’s still one last little 5-mile section between the Table Mesa Trailhead and the point where we turned around yesterday that I haven’t seen.) Like a good part of the BCT, it was rough and rocky, interspersed with some parts where we could move out. We managed almost 11 miles in about 2 hours, so I’m really happy with that kind of pace for as rough-going as it was.

I do like the BCT…one of the topics we discussed yesterday was if I was going to sign up for the 60k at the Black Canyon Ultras in February. Haven’t yet…I’ll have to see how much distance running I can do this winter, because right now I’m in more riding and gym fitness shape than distance running shape.

photo 3 (4)

completely adorable Atti

photo 1 (2)

enjoying the Black Canyon Trail

photo 2 (3)

which way, Atti?

So I’ve got McDowell this upcoming weekend, and that will wrap up the 2017 ride season. It’s the closest, most local ride to me, only 45 minutes away, which is really convenient. And I haven’t given any thought to 2018 yet except for a mental note of “need to renew AERC membership.”

No Stirrup November, Lite

So I have to chuckle a bit at “No Stirrup November” and the idea of dropping one’s stirrups for the month. I’m doing good to ride once or twice a week…I definitely won’t be driving 45 minutes each way to the barn on a daily basis for that particular brand of torture.

Also, it’s been over a dozen years since I did any active no stirrup work. Something about distance riding and trail riding tends to bring about feelings of deep affection and appreciation for one’s stirrups.

But on that same token, I also realize I’ve let myself get a bit lazy and too reliant on the saddle/stirrups. So my goal will be to spend part of my riding time (on Mimi, in the arena) without stirrups. And to continue it beyond just the month of November.

photo 1 - 1

I survived 10 whole minutes of sitting and posting trot torture today

Let’s face it: the pony is a sainted beast who really doesn’t need anything more by way of “schooling” — and frankly, it just annoys her when I try — but that makes her the perfect “schoolmaster” for me to work on me. She doesn’t run off, she doesn’t spook, she doesn’t take (too much) advantage.

And the more I’m focused on me, the less I’m nitpicking or nagging at her.

photo 3 (3)

dressage saddle means time for the rider to be put to work

My core is practically non-existent, so working on an excavation project of discovering those muscles is my foremost priority. While no-stirrup work is theoretically great for building leg muscles, balance and core strength is also a huge part of that, so that’s really my primary purpose in this endeavor.

photo 2 (2)

skeptical pony is skeptical of her idiot mommy’s crazy ideas

Renegade Pro-Comp Glue-Ons at VC100

IMG_9693

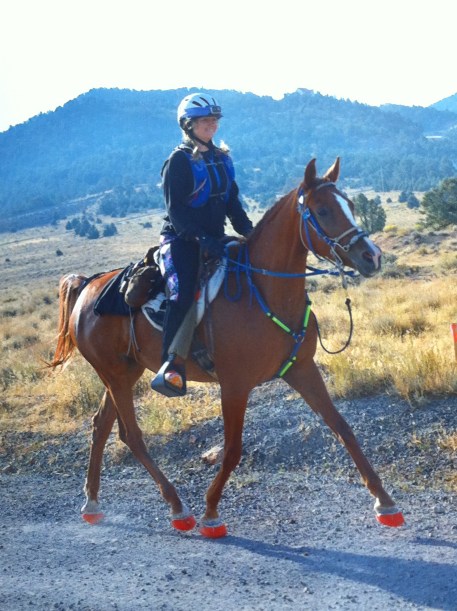
Striding out; I guess she likes her boots. Photo by Gore-Baylor Photography.

After 11 years of competing in Renegade Hoof Boots, I did something a little bit different: used the Renegade Pro-Comp Glue-Ons when I did Virginia City 100.

Up to this point, I’ve never felt a need to bother with gluing on. All of the strap boots I’ve used (both Classic and Viper models) have worked well, and any problems have been minor, easily resolvable, and/or a side effect of being a part of the R&D process.

But 100 miles over lots of rocks is a different kettle of fish. To help mitigate the effects of the concussion from that much hard-pack surface, as well as the rocks, I really wanted to use the pour-in gel pads Renegade offers. For most horses and most circumstances, they’re not necessary…but these were not usual circumstances. The downside to the gel pads is they do take up some space inside the boot where the hoof would normally seat. On some horses, it doesn’t seem to make a difference, but on others, it can change the fit enough so that boot retention becomes more of a challenge. Using the glue-ons in conjunction with the gel pads would (hopefully) mitigate that and be one less thing for me to obsess over during the ride. (All that said, strap Renegades have been used at Virginia City 100 before and successfully completed the ride.)

21230806_10108527425298241_2713669930987373013_n

“care package” from work: all the hoofwear a girl can dream of (glue-ons, extra glue-ons, and strap Vipers to carry as spares)


The Gluing Process

I follow the basic protocols as outlined on the Renegade page: http://www.renegadehoofboots.com/glueon.html, with a couple of modifications along the way to accommodate using the gel pads.

Gluing is pretty much a three-handed job, so I didn’t end up with any pictures of the process other than the finished product, but the videos in the above link give a really good visual demonstration.

Hoof prep is critical. I can just about guarantee that the vast majority of glue-on losses are from either insufficient/incorrect prep, or the wrong size.

Supplies– Renegade Pro-Comp Glue-Ons
– Vettec Adhere glue
– Vettec Dispenser gun (I really like the Deluxe one)
– Vettec mixing tips (I allow at least 2/hoof, plus extras for ‘oops’ moments)
– 36-grit sandpaper (I use 3M “Green Corp” file sheets, which have a mineral blend in them that makes for a sharp-edged grit that will actually score into the hoof, versus a rounded grain that will polish it)
– sanding block
denatured alcohol (rubbing alcohol is not the same)
– small spray bottle
– paper towels
– latex gloves (unless you want to be peeling glue off your fingers for the next week)
– flathead screwdriver
– rasp
– hoof stand (optional, especially if you have a clean, flat surface)
– hoof nippers (or straight edge blade; these are to cut the tip off the Adhere

– Extra Helper (it is possible to glue by one’s self, especially with a very well-behaved horse, but it is so much easier to have a helper there to hold the horse, or pick up a leg, or hand you something)

  • Start with a well-trimmed, well-balanced hoof. Make sure all hoof wall edges are rolled, and that any flare is removed.
  • Begin prepping the hoof wall. Using the smooth side of the rasp, clean off the face of the hoof wall, including back to the heels. (Stay clear of the coronary band and at least 1/2″ below it.)
  • Sand the hoof wall. This is a critical step. The rough sandpaper creates micro-grooves in the hoof, which in effect gives a larger surface area to which the glue can bond. When in doubt, sand more.
  • “Dry fit” the boots to each hoof. Make sure they are a good fit, or if they need modifying. The sidewalls/glue flange of the boot can be trimmed to improve the fit.
    • The most common modification is cutting “v notches” at the toe quarters to adjust the toe angle.
  • Gel Pad Modification: Because the gel pads allow more “movement” of the hoof as it sinks into the gel pad upon landing, this is a really important modification in order to help maintain the glue bond and give the boot multiple points of attachment. If the boot shape needs modifying, use the v-notch method. If the boot is a good fit, then just make two vertical splits, one at each toe quarter. This will allow the boot to better follow the hoof movement without cracking the glue bond at the quarters. (If it does crack, the boot is held on securely at the toe, and because of the splits in the boot, it will not keep cracking the bond all the way up to the toe.)
IMG_9536

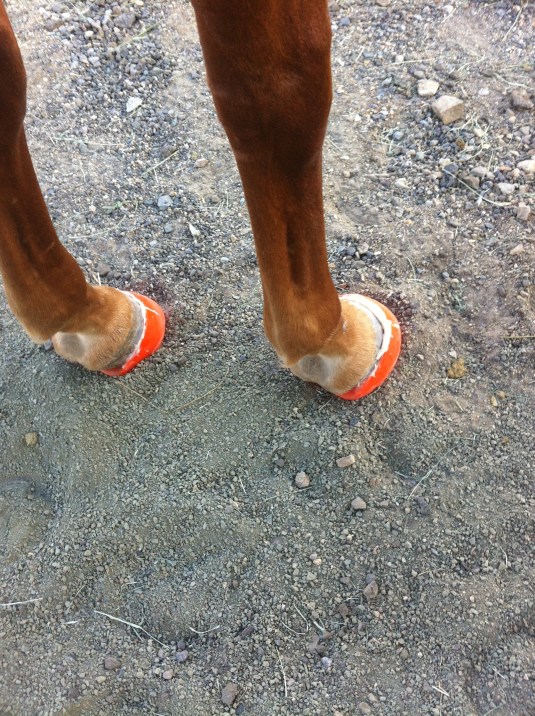
the split can be seen, especially on the left boot, at the inside toe quarter

  • Once the boots are dry fit, scuff the glue flange with sandpaper. They come from the factory already pre-scuffed, but another few swipes with rough sandpaper is that much more grip.
  • Apply latex gloves and spray the boots with denatured alcohol and wipe them out with paper towels. Try not to handle the glue flange after it has been wiped down, and do not touch any of the inside of the boot with bare hands, or it will leave oils and residues. Set boots aside.
  • Spray the hoof with denatured alcohol and thoroughly wipe clean with paper towels. I like to put a spare glue-on on the hoof at this time to keep it clean; otherwise, you’ll want to make sure they stand very still on a clean surface like a piece of cardboard or linoleum square.
  • Assemble glue in dispenser, nip off the sealed tip, equalize the cartridge, and attach the mixing tip.
  • Gel Pad Modification: Apply the glue to the toe glue flange. Set glue gun aside, slide the spare glue-on (if using) off the hoof, and apply the prepped boot to the hoof, making sure it is well-seated at the toe and the tread pattern is aligned with the central sulcus. Carefully either set the hoof down or bring it forward and up onto the hoof stand. (If they fidget or are prone to try to twist the hoof, use the stand method.)
  • Gel Pad Modification, step 2: If the hoof was up on the stand, set it on the ground. Now use the flathead screwdriver to pry the sidewall flange away from the hoof at the quarters; insert the mixing tip and squeeze glue into the space between boot wall and hoof wall on both quarters. (If it took a couple minutes to get the toe gluing done, you may need to change the glue tip — if the glue does not easily flow, it has started setting up in the tip and a new one should be used.)
    • This two-step method also really minimizes the amount of glue that can get under the hoof wall, since the most common spot for that to occur is at the quarters, when the hoof is shoved into the boot, and can scrape the glue off the wall. Having the hoof flat on the ground means there’s nowhere for the glue to go but the space between hoof wall and boot wall.
  • Give the boot several minutes to set up and move on to the next hoof. Repeat the same steps from cleaning with denatured alcohol onward.
  • Allow a couple hours of quiet time for the glue to really cure, but Adhere is fast-setting and I’ve seen boots glued on the night before a ride without any problems.
IMG_9542

The finished job

Removal

Removing the boots can be fairly strait forward, or more time-consuming. They are intended as a single-use product, as it is difficult, or at least time-consuming, to remove all of the old glue from the boots, and a re-glue rarely bonds as well as a brand-new boot.

The quick-n-dirty way is to take a straight edge blade (like a box cutter) and cut along the spot where the boot wall meets the boot sole. The bottom can then be popped off, and the side walls peeled away from the hoof wall with hoof nipper or pliers.

If you really want to save the boots (either for re-use or, like I did, R&D purposes), then it’s the old “screwdriver and mallet” process: Insert flathead screwdriver at a point between hoof wall and boot wall (I find it easiest to start at the quarters), tap with mallet until it cracks the glue, work your way around the hoof.

An alternate to this, thanks to a suggestion from Lucy, is to use a tool used for changing out motorcycle tires — a “tire spoon.” It has a rounded head on it that has a slight curve — position it properly and it actually curves away from the hoof wall, preventing gouging into the wall.

IMG_9679

Why I wanted to “save” the boots — to see wear patterns in the gel pads, as well as glue in the boots. Nothing under the hooves, and I had an equal mix of glue that stuck to the hoof and what stuck to the boot.

IMG_9680

Tread wear. Not bad for 76 miles of very rough trail.

Personal Thoughts/Wrap-Up/Misc Notes

They stayed put for 76 very rocky miles, and as tough as they were to get off, I doubt the last 24 (easier) miles would have done anything to budge them.

For a trail that eats hoofwear (I saw all manner of boots, multiple brands, laying along the trail), I am extremely pleased with how my gluing process did. I don’t particularly like gluing — it’s kind of a pain, especially when you have strap boots that are easy to apply and stay on — but glue-ons do have their place, and it’s a good tool to keep in my arsenal of tricks.

Beeba had one hoof that was a little funky in how it sized — the 0 was way too tight, but the 1 was a little looser than I would have liked. But the same principle applies to fitting Glue-Ons as the strap boots — loose is better than tight; a bit of excess space can always be filled with Adhere, but too tight of a boot will end up popping off the hoof. It was the right front, and in the photos above, you can see how much extra glue I ended up using, and I was never pleased with how it looked…but it stayed on.

I experienced a slight panic attack crimp in my plans when a major storm came through where we were camping the Wednesday before the ride, flooding the horses stalls and making soggy hooves unavoidable. Crap. This was problematic on multiple levels:

  • Wet hooves are soft hooves. Soft hooves over over 100 miles of rock would be more sensitive and susceptible to bruising, even with the protection of boots.
  • Hoof moisture levels can change hoof sizes. Wet = larger, dry = smaller. Potentially not good for the glue bond.
  • While a “normal” level of moisture in the hoof is actually beneficial for glue adhesion, “soggy” is not. But I’m also not a fan of heat guns//torches to force-dry the hoof. Not only is that level of extreme dryness unnecessary, it’s really taking a risk with some very delicate, temperature-sensitive hoof structures. People do it all the time, but I prefer to leave creme brulee as a dessert technique. Denatured alcohol does a really good job of drying out excess moisture from the hoof, as well as removing any oils and residues on the surface.

So I dumped a bag of shavings in the stall to sop up any excess water, sent a couple of texts to the bosses to go over gluing protocols, got reassured that some extra denatured alcohol would take care of the problem, and tried to put aside my worries for the rest of the evening.

The next day dawned sunny and breezy, which dried things out in no time, so some of my concerns started fading. I did a couple sprays of denatured alcohol on Beeba’s hooves before we loaded up to head over to ridecamp, and between that, the trailer ride over, and then hanging out on the very dry parking lot at camp, by the time I was ready to glue on Thursday afternoon, any excess moisture levels were a total non-issue.

This has been a summer of gluing for me, between practice rounds on Mimi, and gluing for/at the Tevis Ed Ride. It’s not hard, per se…it really just takes being able to follow directions, be organized, and have the right tools.