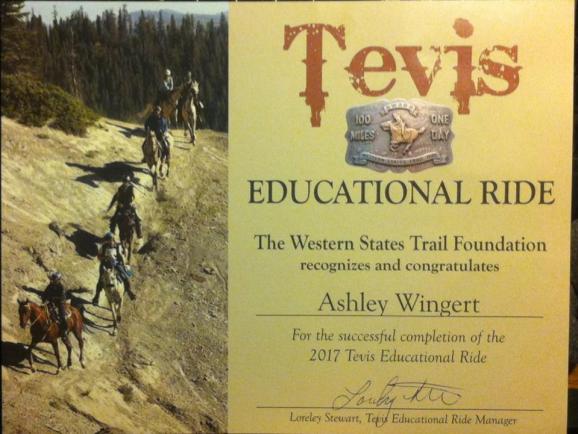
One step closer to my Tevis buckle dreams.
The Tevis Educational Ride has been on my radar for a number of years, for obvious reasons. 1) It’s Tevis-related. 2) Chance to see the trail ahead of time. 3) Chance to be mentored by experienced Tevis finishers and learn appropriate pacing and other ride strategies.
The Ed Ride is held every other year (alternating with the “Fun Ride” which doesn’t cover as much of the trail, and isn’t quite as involved with mentoring/education), and includes two days of riding over basically 2/3 of the trail in a small group (2-3 people/mentor), as well as extra clinics and seminars that are particularly relevant to Tevis. To give an idea of the experience and educational value earned, despite the fact you cover 64 miles over the two days, completing the Ed Ride counts as 150 qualifying miles, for those trying to make their 300 qualifying miles to ride Tevis.
However, it’s a big time and $ commitment, especially if you don’t live in the area, so for those reasons (as well as timing, horse suitability, etc.), I’d never managed to make it to the Ed Ride. Fortunately, over the last few years, I’ve had a number of opportunities to do various and sundry pre-rides on the Tevis trail, usually coinciding with my mostly-annual crewing trips to Tevis.
This year, I was offered a chance to do the Ed Ride. A friend was going up to be an Ed Ride mentor, and had an extra horse she wanted to also have see the trail. I didn’t even have to think about that one at all — count me in for sure!
Fast forward to the Wednesday before the Ed Ride. I flew up to Las Vegas, NV early in the morning, Cathy picked me up from the airport, and we headed back to her place to finish packing and prep work. I met my ride for the weekend, an 8-year-old Al-Marah-bred gelding named Dean. This is his first season of endurance (after flunking out of both reining and dressage training) and he’s done 7 50’s to date, so went into the weekend with a good fitness base and some good seasoning and exposure to the sport (he’s done several XP rides, so technical trail was nothing new to him).

AM Magestic Dean (AlMarah Mr Dream x Al-Marah HRH Domaine)
We got tack sorted and cleaned, stirrup lengths adjusted, and then glued hind boots on, a process that actually happened with minimal swearing or teeth gnashing.

Tempest’s hind boots

Dean’s hind boots
While both horses have good hooves and tend to wear boots well, both of us opted for the extra insurance of using Renegade Pro-Comp Glue-Ons for the hind boots for the weekend. The canyons on the Tevis trail are a notoriously difficult place to keep boots on, thanks to a combination of climbing, some technical spots, some water crossings, and the amount of sweat that ends up coming off the horses.
Between Cathy, Cathy’s husband, and myself, we got both horses glued in less than an hour, taking into account boot sizing, gathering of materials, and then the actual gluing itself. Not too bad. The process for gluing Renegades isn’t necessarily difficult, per se…it’s just precise, and if the proper steps aren’t followed or followed sufficiently, then the glue job won’t be successful. And spoiler alert: they all stayed on through the whole weekend.
Thursday morning the horses got a quick bath, then we loaded up and were down the road. Because it’s a good 10+ hours between Vegas and Foresthill with a trailer, we had opted to split the drive into two days and overnight in Fallon, NV on the way up.

driving by Walker Lake
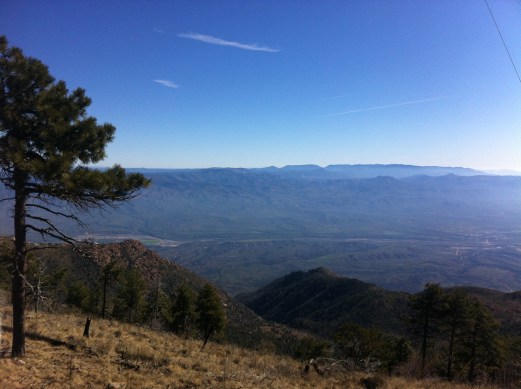
It was a 6-1/2-hour drive on the way up, including one gas stop. Around Hawthorne and up past Walker Lake, we ran into some unexpected clouds/rain, which was a welcome relief and dropped the temperatures down into the 80s.

settled in at the Churchill County Regional Park/Fallon fairgrounds
They got a chance to do a quick leg stretch in the arena (although were more interested in rolling in the dirt) before we settled them in a pen for the night. For us humans, luxury came in the form of power hookups and water at the campsites…hello, air conditioning and shower! I could very easily get used to this.

Dean on the left, Tempest on the right
Friday morning, we loaded up and were back on the road bright and early after one last leg-stretching session in the arena. While they hadn’t done much the previous evening, they put on quite show in the morning — running, leaping, twirling, the full Arabian routine.
It was about a 4-hour haul through Reno, over Donner Pass, into Auburn, and onto Foresthill (including a fuel stop and stop at the CA/NV border ag station).

stopped at the ag station. still snow on the mountains!
We pulled into camp at the Foresthill Mill Site (same location as the Foresthill vet check at Tevis) shortly before noon, and there were already at least a dozen rigs there.

settled in at camp
Once they were settled on their respective Hi-Ties, we went over to check in for the weekend (Cathy as a mentor and myself as a rider), and go lighten our wallets at the Tevis Store. (My most-abused phrase of the weekend any time I would spend $ was “But it’s for a good cause!” as it all benefits the WSTF and the Tevis trail.)
I impulse-bought a couple of Kerrits IceFil items, as I was rapidly cooking in the hot sun and decided that the long-sleeve IceFil shirts were probably my best bet for weekend attire…and since I only had one long-sleeve shirt to bring with me, well, impulse shopping took care of that little problem.
Vetting in started at 3, and I believe we were over there shortly after it started. Fortunately there were patches of shade we were able to stand in while we waited in line.

We’ll take it. Given he had eaten all night previously, and in the trailer, and all afternoon at camp, I wasn’t too concerned about the couple of B’s on gut sounds.
He even trotted out nicely for me…which he does when he feel like it. However, once the ride starts, his general attitude towards trot-outs is “Can’t Be Bothered.” Can’t complain about his other ground manners, though — stands politely, doesn’t fuss or trod on people, and an angel for vet handling.
Late afternoon the riders all gathered for a meet-n-greet with their chosen mentors. For the first day “long ride” option, there is a entry cap of 20 mentors and 60 riders, keeping the groups a nice, manageable size of 3 riders per mentor. It’s a pretty casual, relaxed affair — the mentors list their names, and the speed they intend to pace at (“fast”, “medium”, or “slow”), and riders can then sign up with their preferred mentor. Obviously since I was traveling with Cathy and riding one of her horses, I was signed up with her. :)
In-between the meet-n-greet and one of the educational seminars, I was called upon for some emergency boot-gluing services for one of the ladies who would be riding with our group. The gaiters of the boots she had been using the previous day had rubbed on her horse, making him sore enough to be off, and she wasn’t sure if she would be able to ride the next day or not. Cathy had extra Renegade glue-ons packed with her, so we offered to glue them on and see if it made a difference.
20 minutes later, front boots were glued, the horse was standing happily, and after a couple hours of letting the glue fully set up, he trotted sound. I made no promises as to how it would hold up, given the fact that, despite helping with doing glue-ons for a number of years now, I had yet to actually tackle an entire glue job on my own.
I guess that’s on-the-job training?

Spoiler Alert 2: They also stayed on ;)
The evening lecture was from Susan Garlinghouse, DVM, and she gave a really good lecture on feeding and electrolyting, specifically with 100-milers in mind, and some Tevis-specific relevant tips. She is always so generous with her knowledge on some of the Facebook groups, and really knows her stuff in regards to nutrition and performance. She’s also a highly entertaining speaker (bonus points for working in the phrase “take it worth a grain of salt” when discussing electrolytes), and knows how to distill down information into easily-digestible tidbits for us laypeople.
A local taco truck came in and set up shop on-site for Friday meals, and three tacos later, I was quite satisfied during the ride meeting. The ride meeting was pretty straight-forward, covering logistics: we would meet down at the Mill Site entrance at our designated times, load up into shuttle trailers, and be taken up to the start at Mumford Bar trailhead, where we would be dropped off and then ride the 25 miles back to Foresthill along the trail.
A note regarding the Ed Ride trail this year: Due to the absurdly high snowpack levels in the Sierras, the Ed Ride followed a slightly different route. The first canyon (with the “Swinging Bridge” at the bottom) had suffered some trail damage from a mud/rock slide, and while it had been open for the Western States Run last month, it wasn’t safe for horses, and while repairs will be complete by the time Tevis rolls around, an alternate start was designed for the Ed Ride.
Instead of going up to Robinson Flat, we were dropped off at Mumford Bar trailhead, about half an hour drive from Robinson Flat, and rode down Deadwood Road to the Deadwood vet check, bypassing the first canyon entirely. (At this point, I am convinced that I will not actually see the first canyon until I actually ride Tevis.)
From Deadwood, we picked up the actual trail and took it the rest of the way in to Foresthill. Obviously, this shortened the mileage from the standard 32-mile day to about 25 miles, so for the small handful of people who needed the full mileage of the Ed Ride for their Tevis qualifying miles, they also had an out-and-back segment added on to their route to make up the miles and the descent/climb.
Day Two also experienced some trail alternations. The American River is flowing at a rate that is almost 5x what is ideal/safe for horses to cross — the winter rain/snow and subsequent snowmelt has the river flowing uncontrolled over the Oxbow Reservoir spillway. Because the river is normally dam-controlled and under regulated release, the high point of the water releases normally don’t hit that far downstream at the river crossing point until late afternoon, making it safe to cross in the earlier parts of the day. The dam-controlled aspect is also what allows the river to be held back for the duration of the Tevis ride day, making is safe to cross even in the late night/wee hours of the morning.
Normally the Ed Ride would get to the river and cross it early enough in the day to then continue on in to Auburn. This year, however, we were re-routed after Francisco’s to continue up Driver’s Flat Road (the road that is used to access the Francisco’s vet check) and finish at the Lower Driver’s Flat parking area for an approximately 20-mile day, and then be shuttled back to Foresthill from there.
Friday night was a bit restless, as it usually is for me, interrupted by Dean busting loose from his Hi-Tie at one point. Fortunately he didn’t go anywhere, but that involved having to r-attach his rope to the Hi-Tie.
So when my alarm went off, I was happy to get up and get on with things. Because saddles had already been packed the previous evening, all I had to do was pull on riding clothes, drink my coffee and eat some breakfast, then go tack up.
Cathy’s horses are used to being trailered with their tack on, so that was one less thing to mess with — just walked them down to the meeting area and they hopped right into the trailer, and we were on our way.

our group: Gayle/Bo, me/Dean, Cathy/Tempest, Liz/Boon
From our drop-off point at Mumford Bar, we mounted up and headed down Foresthill Rd for a little less than a mile to the turnoff on Deadwood Rd. Fortunately it was early enough on a Saturday morning that traffic wasn’t an issue.
In my typical catch-rider fashion, I climbed on Dean for the first time there at the trailhead. I wasn’t quite sure what to expect from him…he had done a number of rides already this year, and only a tiny handful of minor indiscretions since Cathy had him…but old habits die hard (for me) and I still have a hard time relaxing and just jumping on board without wondering if the explosion will follow shortly thereafter.
He was just fine, and handled all of the commotion at the trailhead and heading out onto the street without fuss. He did start trying to jig and get really bunched up about 1/4-mile in when Tempest started outwalking him, so rather than get into an argument or have to get too in his mouth, I just jumped off and started hand-walking him down the road until we reached the Deadwood Rd turnoff. Once I climbed back on, we started trotting, and we found a better rhythm from there.
It was about 7 miles down Deadwood Rd to water, and we alternated walking and trotting, switching off and rotating through who was leading. We got passed by several groups — riding a faster pace than we were, but got a later start for shuttling or getting on the trail. No biggie — it was a great place to pass, since it was a dirt road. However, once we had been passed, Dean suggested to me a couple of times that “Wouldn’t you like to catch those horses ahead?” Nope, dude, we’re hanging back and taking it easy today.
We connected up with the actual Tevis trail about 7 miles in, at what would normally be the top of the climb out of the first canyon — the Devil’s Thumb water stop. They had troughs out, so the horses were able to tank up really well, and then we moseyed in the mile +/- into the Deadwood vet check.

Devil’s Thumb area. The break in the fence on Cathy’s left is where the normal trail comes in.
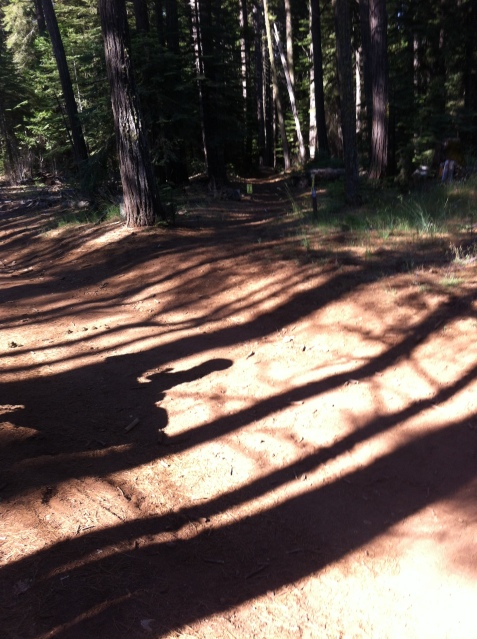
single-track trail into Deadwood (sorry, horrible mixed light meant most of my photos aren’t the greatest)
There was quite a back-up for the vet line at Deadwood, so we had some time to let them drink and eat. There was a volunteer there doing courtesy pulses — since I had no idea what to expect, I had her check Dean and she said he was at 68 just coming in.
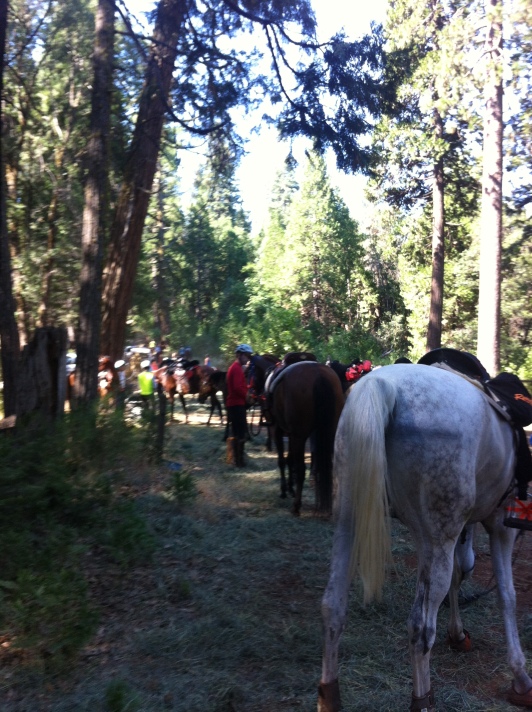
waiting in line at Deadwood
Once he got a drink, we did the actual P&R…unfortunately, the pulse taker was just putting ’60’ on the cards if they were at or below criteria, so I don’t know what Dean actually came in at since all pulse taker said was “he’s way down, so as long as they’re down, I’m just putting 60 on the card.” :/ Would have liked the accuracy for information’s sake, but what can you do? <shrug>

when you’re waiting, you take pictures. this guy just makes me grin.
I took advantage of the downtime to fill my bottles and water pack, and grab some snacks and stuff my face. Practicing efficiency was one of my goals for the weekend, so I felt good about using my time in line well.

clean-up crew at Deadwood
Dean vetted well, and after everyone in our group was ready to go, we scuttled off down the trail towards El Dorado Canyon.

in line at Deadwood
There are a couple of exposed areas going down the canyon that make me squeak a bit. Funny enough, I’m actually better about those spots when I can trot through them, but on this day, we ended up walking some of those areas, so I jumped off and lead for a little bit. Dean and I were at the back of our group, so it was more efficient for me to power hike or do some jogging than to be doing the speed up/slow down thing in the saddle.
This trail can really mess with your head in parts. At one point, I swore I was seeing what looked like a little trickle of water/mud across the trail — which there was — that then opened up into a puddle of water that was reflecting the trees and greenery. Ummm, not so much on the puddle part. It was actually open air and really tall trees. That was kind of an “eep” moment for me, and I doubled down on keeping a really strong leg on Dean, reminding him that there was a drop-off there.
It was hot, hot, hot down at the bottom of the canyon, so we only lingered for a brief moment before continuing onward, bemoaning the fact that El Dorado Creek was so difficult to access. However, they had the route detoured to the little creek that is just off the trail a little ways, and we were able to let the horses drink and give them a good sponging.

climbing up the Michigan Bluff side of El Dorado Canyon
The climb up to Michigan Bluff is long, and hot, and the horses all start thinking you’re a little bit crazy. Fortunately there’s actually a good amount of shade along the way, but being in a canyon, there’s not much air movement, so it gets pretty warm when you’re walking up the climb.

manzanita tunnel at the top of the canyon
Once you hit the manzanita tunnel, that’s a sign that you’re near the top of the canyon and almost to Michigan Bluff.
On ride day, Michigan Bluff is a water stop only, but for the Ed Ride, they did have a vet check there. All of the horses drank well as we sponged them down, and Dean was at pulse criteria within a couple minutes of coming in and drinking.
There was a line for the vet here as well, so we found some shade and hay and again let them eat.

Yeah, happy with that.
Rather than get bogged down in another line at the Pieper Junction/Chicken Hawk check, we elected to hang out a few extra minutes and let them eat at MB before moseying out and making our way the couple miles to the next check.

“Frat Boy” at MB — eating, drinking, chillin’ in the shade

riding out of Michigan Bluff. An iconic Tevis moment when doing the ride…being there at the Ed Ride was enough to give me chills
The road between MB and PJ/CH is pretty trottable, although I had forgotten that there’s a little climb slipped in there (~400′ in less than a mile, but it’s right before the check, and all the little climbs add up).
Our strategy initially paid off when we reached the check, as there were way fewer people in line ahead of us…unfortunately, while we were pulsed down and standing in line at one of the troughs, a group behind us slipped in to an open trough ahead of us…and then decided that was “their” place in the vet line. Lesson learned: if you’re in the back of the line and people come in behind you, make sure they know you’re the back of the line. Or don’t leave a gap in-between troughs that people can slip into.
If it had been an actual ride, chasing the clock, I would have been more upset, but we weren’t being timed, and we were already out there…what difference was an extra ten minutes going to make, under the circumstances?
Dean was a little lackadaisical in his trot-out, earning him B’s on gait/impulsion/attitude, and for me to quip, “B for ‘Can’t Be Bothered.'”
One out of the check, we collectively as a group decided that we’d like to try a slightly faster pace whenever appropriate for this last canyon, as it was getting pretty warm and we were all about ready to be done for the day.

down into Volcano Canyon
Volcano Canyon is the “baby” of the three canyons, but what it lacks in depth it makes up for in being much rougher and rumblier footing. I last rode this canyon in 2014, and was able to jog-trot a good part of it…this year, we were reduced to a slithering walk on a lot of it.
The Volcano Creek crossing itself was a bit exciting. It’s always pretty rocky and slippery, and this year, Volcano Creek was a lot higher and faster-flowing than normal. Dean and I were in the lead at this point, and when he got to the edge, he decided, “Nope, not happening.” I jumped off as he contemplating back up the uphill single-track with a few drop-off areas, knowing I was probably going to have to get wet in order to get him across. I glanced at a couple of rocks, briefly contemplated rock hopping, concluded my odds of slipping on the rocks and ending up all the way in the creek were probably greater than not, and resigned myself to trudging across.
Yes, ultrarunner is a wimp who doesn’t like getting her feet wet.
Sure enough, the rocks were slippery, and Dean had a few slip-n-slide moments down in the creek, with a quick scramble at the end to get the heck outta there.
The water was cold, but felt really good, and I ended up about mid-calf deep after we cleared the main part of the stream and moved off to the other side to allow more of our group to fit in. This was another great chance to sponge the horses down, and since I was already partially wet, I squeezed several spongefuls of water over my own head/neck.
The last bit of climb out of Volcano Canyon goes by a lot quicker, and then we were at Bath Road. Now that is the part that takes way longer than expected. It’s the road that just keeps going.

heading up Bath Rd, almost back to Foresthill
Dean was still perfectly happy to keep offering to trot, especially when some of the larger horses would out-walk him, and a few times, I obliged…a few other times, I insisted he needed to work on his “walk out” skills.
And then we were back at Foresthill and the familiar entrance to the Mill Site…a path I’ve traveled a number of times now with crewing. We got the horses pulsed down and while Dean initially was presenting to the pulse person at 64, as soon as dummy here realized I forgot to loosen his girth, his pulse immediately dropped to 56. (How long have I been doing my vet check routine of dismount and immediately loosen girth?)
We dumped off their tack at the trailer, then immediately went over to vet. Dean gave me the most unimpressive trot-out ever (seriously, can’t be bothered), although I guess he still looked perky enough for A’s on his movement scores, and the vet had some useful tips for teaching smart trot-outs.
We discovered he did have a slightly sore girth rub (coincided with the nylon edge of the billet keeper strap), as well as some scrapes and dings on a hind leg from slipping in Volcano Creek, although those were all surface.
Once we were vetted out for the day, it was back to the trailer to clean them up and let them eat, and our riding group hung out in the shade and re-hydrated ourselves until it was time for the BBQ dinner.
They served some delicious grilled chicken and tri-tip, plus salad, watermelon, and garlic sourdough bread. I know I’m pretty easy to feed, especially after a day of riding, but this really hit the spot, and we wrapped up the evening with a Q&A panel of half a dozen experienced Tevis riders answering open forum questions posed to them.
Some interesting tidbits were picked up, but my biggest takeaway from the panel is “you need to figure out what works best for you and your individual horse.” If you get the same/similar enough answer on a subject from half a dozen very experienced people, then it’s likely that is a reliable tidbit to file away as “critical information” for later.
But things like shoes/splint boots/electrolytes are all such personal topics that depend very much on the individual horse and rider, and you can try to emulate a person and everything they do as much as you want, but that isn’t going to guarantee you the same level of success if that particular protocol isn’t appropriate for your horse or you as a rider.
Anyway…after the panel wrapped up, Cathy and I made a quick decision after looking at saddles, Dean’s girth rub, and girth options…since we had each saddle set up for ourselves with our individual packs, etc., and since the saddle Cathy was riding was rigged just slightly different than the one I was riding, rather than switch everything between the saddles, we would keep our saddles and just switch horses. Unconventional, I guess, but it worked.
So Sunday morning saw me crawling out of bed and repeating the same morning routine of riding clothes/coffee/breakfast. I had already filled my water pack and set saddle snacks out, so I just had to stuff bottles and snacks into the pommel pack, put front boots on, tack up, and we were ready to go.
Sunday’s route was a point-to-point of California Loop up Driver’s Flat Rd, at which point we would be shuttled back to Foresthill. I did this exact same route last summer with Lucy and Kaity, and while I had a few “squeaky” moments, overall I was surprised by how “not scary” I found Cal Loop to be. (I’m sure it’ll feel different in the dark, but with my overactive imagination, it’s far better for me to go into a scenario knowing “yep, have already done this trail, we can handle it” than to be wondering just what the heck we’re traversing over.)
I also had the advantage today of being on the experienced horse — Tempest finished Tevis last year, so she knew where we were at as well. From the get-go she felt good, snorting softly as we trotted by the cemetery (another “I see dead people” horse), and striding out through town. Even if she did have to stare suspiciously at the liens in the road and any stop sign/crossing writing on the road.

“Slow? I don’t wanna go slow.” Theme of the day.
Dean and Cathy initially lead out once we passed through town and hit the trail, but Tempest was in fire-breathing dragon mode (which I’m familiar with thanks to Mimi) and was having way too much fun breathing down the more slow-moving Dean’s back, so I shuffled her to the front at the first appropriate moment and we led the way down Cal Loop.
I wasn’t sure what to expect the second time through — now that I had seen and knew what parts I considered kind of “scary,” would I be looking for them? Would it seem worse? There’s one exposed section with very little “catch vegetation” before Cal 1 that I hadn’t cared for, but for whatever reason, it didn’t even register in my brain this time. We reached Cal 1, and I had a moment of going “wait, we’re at Cal 1 already?”
Now, we did have a “moment” at one of the Dardanelles Creek crossings on the way to Cal 1. There was a very large step-down into a very rocky crossing — hard to find good footing, and the water depth was hard to see. I once again hopped off, this time making it across without getting soaked, but when Tempest went to cross, she slipped and did a very impressive flail/scramble to get through. If it gives you an idea of the degree of scramble, one of her fetlock interference boots ended up inside out and up near her hock.
Lesson learned: try to stay on the horse if at all possible on water crossings. I just wasn’t sure if I was going to be able to get her to cross it without a major fight or a ridiculous cross-country leap over it. Hindsight, even the leap probably would have been better.
So much of Cal Loop is so trottable. The footing is good, for the most part, and the grades are gentle enough to allow for some good stretches of continuous trotting. Which Tempest was more than happy to oblige.
Just after Cal 1, we switched it up and put Dean in the front again. Fire-breathing dragon mode activated on Tempest again, and I got some good practice in riding off my core, and using seat and legs to keep her an appropriate distance back versus hanging in her mouth the whole time. We reached a fair-to-middling compromise on the issue.
The section between Cal 1 and Cal 2 was a little longer than I remembered, although fortunately there were some natural springs/creeks flowing for the horses to drink. But we did reach Cal 2, and set off down those switchbacks. I swear, this whole trail flows like a time warp, because the Cal 2 switchbacks were a lot shorter than I remembered.
The Ford’s Bar section — where you climb up, and then climb right back down — was just as nonsensical as I remembered. This area was a part of last year’s Trailhead Fire that burned just a few weeks before Tevis, but some of the greenery is already starting to come back.
The next section, between Ford’s Bar and Sandy Bottom, also had some “exposure” sections I hadn’t been real fond of previously, but I actually felt comfortable enough to trot through a good part of it this time. Tempest is really sure-footed and smooth, so it’s easy to feel really comfortable on her. She tended to “look” at things, especially rocks/logs, but all she would do was tip her head and start a little bit, and I never felt worried about her slipping or stepping off the trail.
Down at Sandy Bottom, we were fortunate enough to find an access point down to the river, so we took several minutes to go down and let the horses drink, and stand in the water and cool off. After the previous day’s water-crossing episode, I was pretty immune to the whole “I don’t wanna get wet” thing, so tromped right into the river myself, getting knee deep, and using the horse sponge to thoroughly drench my head/neck.

Cathy with Dean in the foreground; me and my obnoxiously fluorescent sponge (and a sulking Tempest) in the back
Tempest didn’t find the river nearly as amusing as the rest of us. She drank well, but had to be begrudgingly dragged fetlock-deep into the water so I could more easily sponge her. (Also not an amusing trick, per her.)
That was the most refreshing 5-minute break ever, and totally worth the time spent.

down at Sandy Bottom
From there, it was a couple more miles along the river road to Francisco’s. Normally a check on the ride (an initially supposed to be a check for the Ed Ride), this time the road down to the check was too rutted out to be able to safely get vehicles/volunteers down to that point. They were able to get several troughs, hay, and some people snacks and waters, down to a spot just before Francisco’s, so we had a chance to get more water and let the horses eat for a few minutes before heading up to and through the Francisco’s meadow and up Driver’s Flat Rd.
We passed by the turnoff the trail takes to Poverty Bar — Tempest glanced that way, and then kept peering off to the side as we climbed the road, as if to say “Umm, don’t we go that way?” Nope, not this time. Climb, climb, climb we go, up ~1800′ in ~2 miles. Tempest was a climbing machine — any time I’d offer to let her stop in the shade, she’d brush off the offer and just keep marching.
The Lower Driver’s Flat parking lot was a welcome sight — hay and water for horses, food and cold water for people, and lots of shade to hang out and take a breather for a bit. They made this our finishing point, so when we vetted out, we were done for the day.
I forgot to get a pic of the vet card, but I do remember Tempest vetted out very well (she does a gorgeous in-hand trot-out), and had pulsed down to 52 by the time she was finished drinking.

hanging out at Driver’s Flat
We hung out around the troughs and in the shade for probably about 10 minutes after we were done, letting the horses eat and drink. At one point, I was sitting on the edge of the trough, and Tempest decided she was so thirsty, she was getting to that trough no matter what…pretty sure she was intent on pushing me in if I hadn’t slid out of the way fast enough. (That would be the side of her that qualifies for “mare ‘tude.”)
Then we moseyed up to the Upper Driver’s Flat parking lot where we were able to shuttle back to Foresthill with a couple of other riders. Got the ponies untacked and cleaned up, and while Cathy worked on packing up the trailer, I worked on removing hind boots.
There are a couple of ways you can go about removing glue-on boots. You can use a flat-head screwdriver and chisel between the hoof wall and boot wall and break the glue bond. You can chop the boot wall off in pieces with hoof nippers. Or you can cut the sole of the boot away and then peel the boot wall off the hoof wall. I opted for the third option.
You do want a horse that stands quietly, as you’re going to be working with a knife. If they don’t stand well, or have a tendency to fidget, maybe use one of the other options. Even with a quiet horse, be careful. It’s still an exposed knife blade. I use a straight edge box cutter, something I can adjust so that only a small amount of the blade is sticking out, just enough to penetrate the thickness of the boot wall. Cut around the outside of the boot, at the point where the boot wall joins the boot sole. Since there’s no glue on the sole of the hoof, once the cut is complete, you can pop the sole of the boot off the hoof. Then grab a corner of the boot wall and start peeling it off the hoof wall.
I had both horses hind boots off in about 15 minutes.

Tempest’s hind, post-removal. She wore down more tread on her boots.

Dean’s hinds, post-removal. He had v-notches cut into his boot walls, so they came off in pieces. Tread isn’t as worn. Not only is he a lighter-weight horse, I had a pair of Viper glue-ons on him — slightly deeper tread.
Very pleased with my experience in using glue-ons for the weekend. I love the ease and convenience of using a strap boot for training and the vast majority of rides I do. But for certain scenarios, it is really nice to have the glue-ons as an option.
The afternoon wrapped up with an awards presentation for our completion certificates (pictured at the top), and a giveaway prize raffle. (I actually won an ice pack shoulder wrap thing.) The ultimate prize, of course, was a Tevis entry. Nope, didn’t win the Tevis entry. ;)
Cathy headed out after awards — Tempest is slated to go to Tevis is year, so rather than haul all the way back to Vegas, and then back up to Tevis less than a month later, she found a place outside of Reno to keep the horses and will fly back in ahead of Tevis.
And I headed for Tevis Low Camp (aka Lucy’s, aka my Sierra Foothills home away from home), where I got a shower, pizza, beer, and lots of laughs and great conversation. Monday morning, Lucy deposited me off at the Sacramento airport (seriously, I know this place as well as Phoenix at this point), and I came home to two very happy pups.
It was an absolutely amazing weekend…ride management and all of the volunteers put on a fantastic ride, I learned a ton, and had a blast. I can’t thank Cathy enough for providing me the opportunity to participate in the Ed Ride weekend, and for sharing her ponies with me.
Next up: Food/Drink/Clothing/Tack/Afterthoughts